How to connect Podda to ChatGPT
This guide will show you how to add Podda as a custom connector from ChatGPT's settings. It takes about a minute and you only have to do it once.
ChatGPT keeps custom connectors behind developer mode, so you turn that on first.
Step by step
- 1
Turn on developer mode in ChatGPT's settings.
Open ChatGPT settings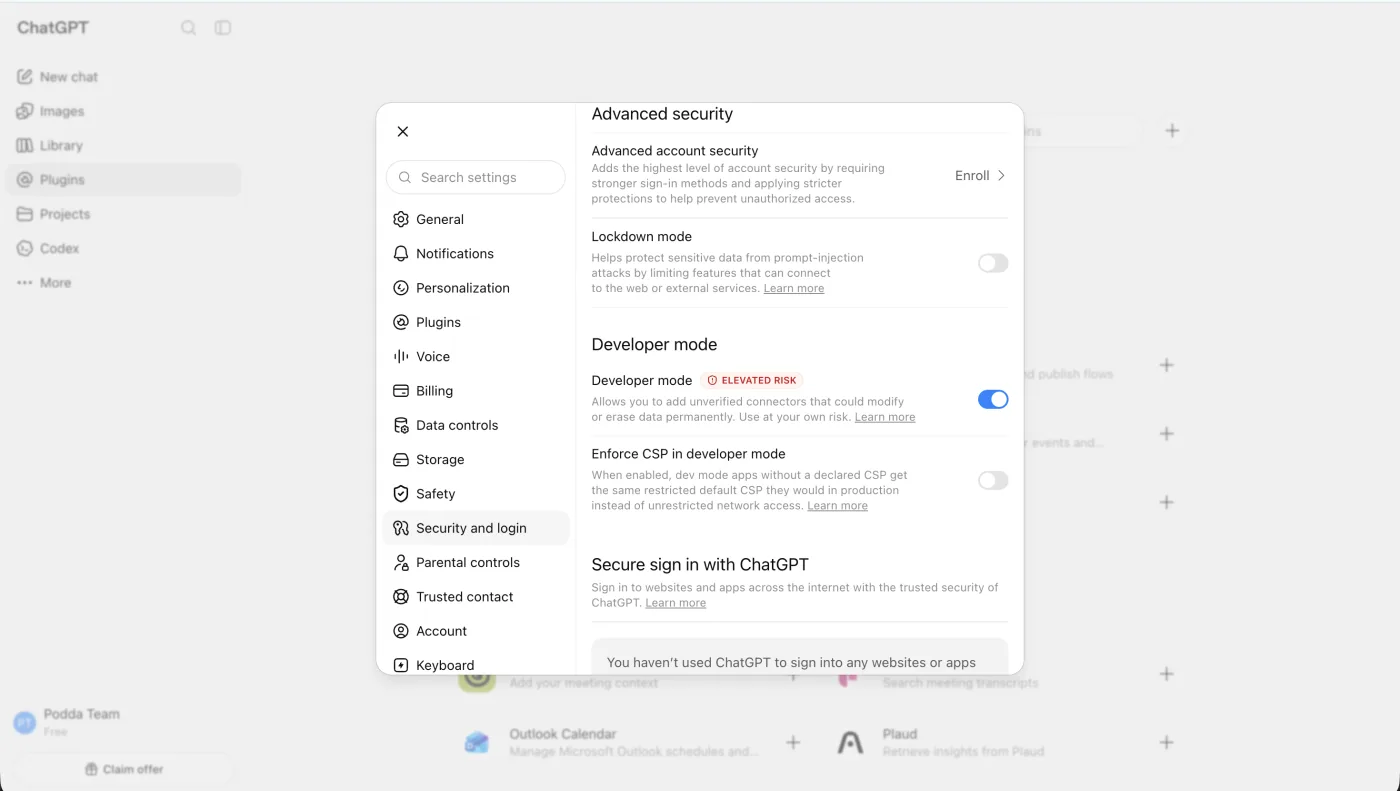
Switch developer mode on in ChatGPT's settings. - 2
- 3
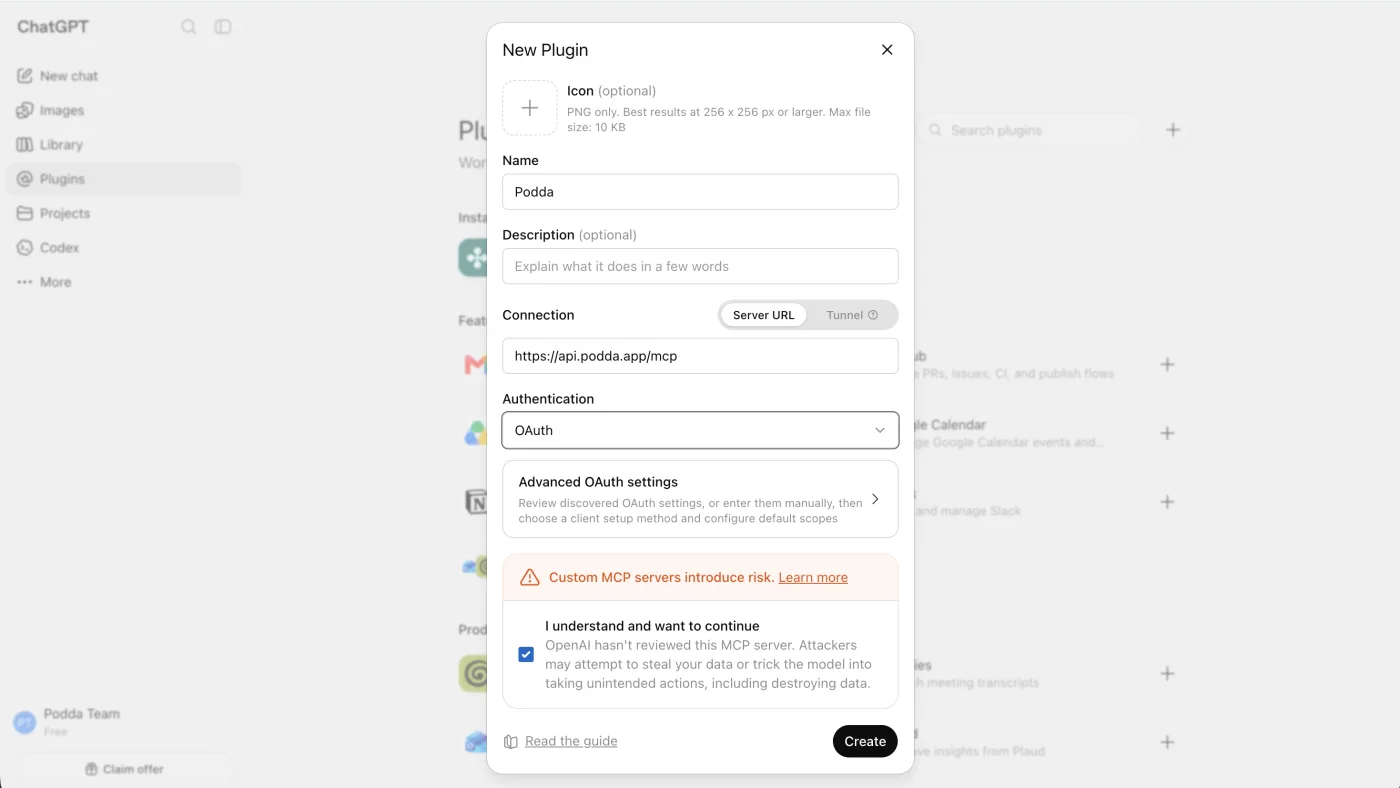
Give it a name and Podda's address, then create it.
Name
PoddaConnection (URL)
https://api.podda.app/mcp - 4
Press Connect. Sign in to Podda in the window that opens, then choose Allow.
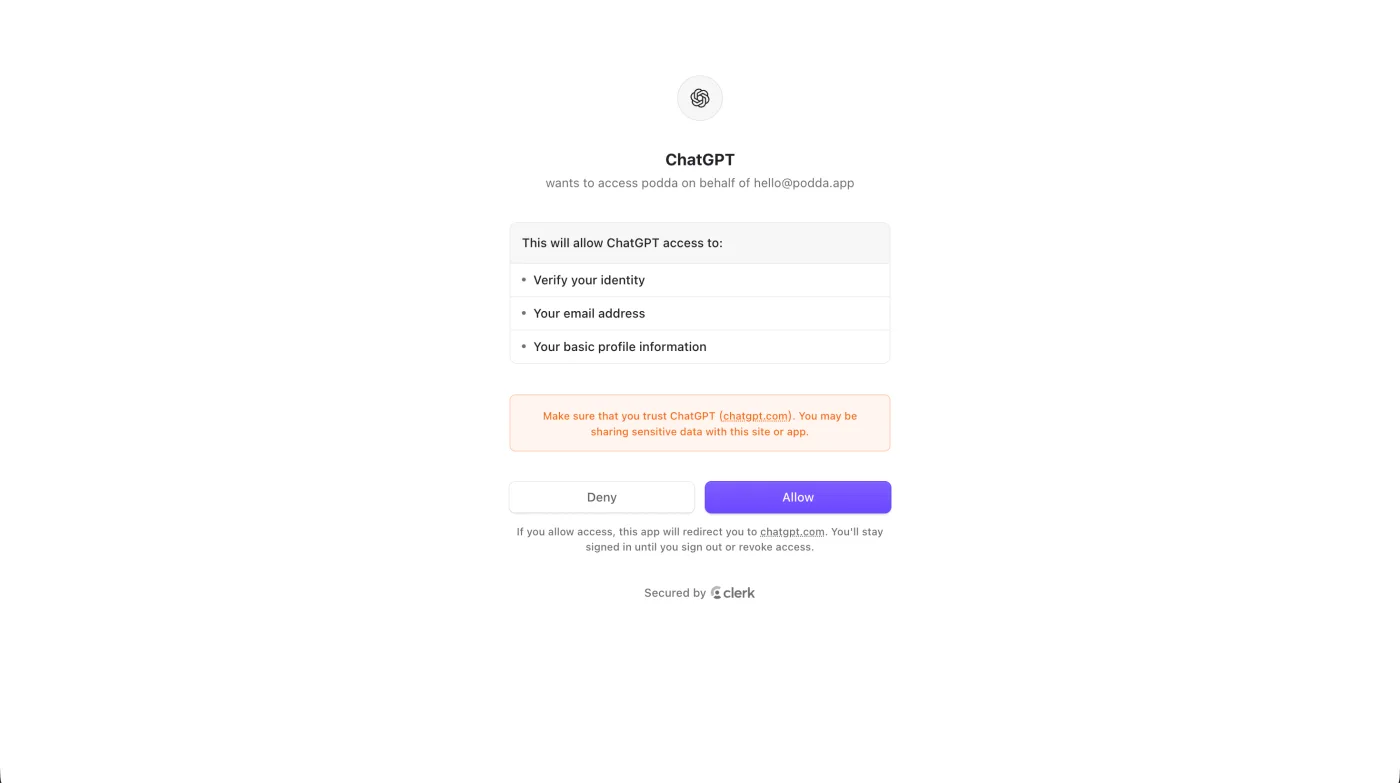
Sign in to Podda, then choose Allow.
How do I know it worked?
Once it is connected, check that your assistant can actually reach Podda. Start a new chat and ask it to list your apps.
- 1
Say this to your assistant:
can you connect to podda? list my apps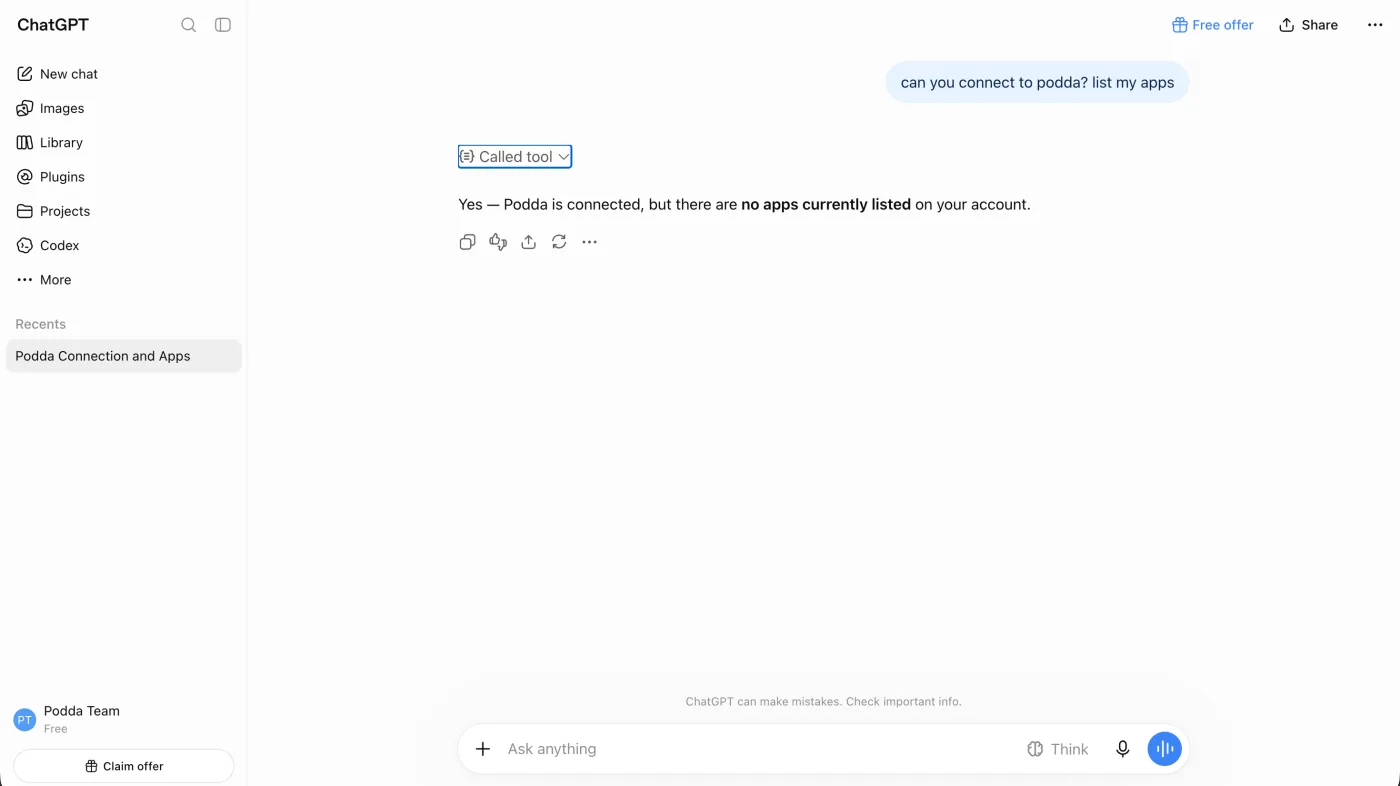
The assistant answering the test, which proves it reached Podda. - 2
It will ask permission to use Podda's tools. Choose Allow.
- 3
Your assistant will tell you whether it reached Podda. You will not have any apps yet, and that is fine.
How do I publish an app?
You just ask. Describe the app you want in plain words, and your assistant builds it and publishes it to Podda for you. No setup, no code.
Already have something? Point it at what you have and say to put it on Podda, and it does the rest.
For example, say:
Build something new
Make me a chore chart for the house and put it on Podda.Publish an existing app
Put my budget spreadsheet on Podda.
What if it will not connect?
Double-check the address. It has to be exactly https://api.podda.app/mcp, with no spaces around it.
Make sure you finished the Allow step. Closing that window too early leaves it half-connected.
Start a new chat before you ask. A chat you opened before connecting will not see Podda yet.
Confirm developer mode is still on. It can switch itself off after an update.
Last updated August 2026.